 Orders placed between June 24 and July 5 may experience slight processing delays due to inventory reconciliation and warehouse maintenance.



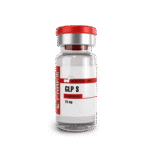
A peptide vial can look small, simple, and standard – but it is still a critical checkpoint in the quality chain. Knowing how to inspect peptide vial quality before research helps protect the integrity of your work, your records, and your purchasing decisions. A professional inspection is not about guessing what is inside the vial. It is about verifying that the product received matches the supplier’s stated standards for packaging, labeling, physical condition, storage, and traceability.
For serious research buyers, appearance is only one signal. A clean vial does not prove identity, purity, concentration, or sterility. Those claims require documentation and analytical testing. Still, a disciplined visual and documentation review can catch avoidable problems before a compound enters a research workflow.
Start Before You Open the Package
The inspection begins when the shipment arrives, not after the vial is already on the bench. Check the outer mailer for crushing, punctures, moisture exposure, excessive heat damage, or signs that a package was opened and resealed. If the shipment includes temperature-sensitive materials or cold-pack components, note their condition immediately.
A warm cold pack does not automatically mean the product is compromised. Transit time, ambient conditions, and the compound’s stated storage requirements all matter. However, a package that arrives heavily damaged, wet, or visibly tampered with deserves documentation before anything is discarded. Take clear photos of the shipping box, internal packing, and product condition while the evidence is still intact.
This initial step matters because supplier accountability depends on a clear chain of custody. If there is a problem, accurate photographs, delivery timing, and order details give a trusted supplier the information needed to investigate it properly.
How to Inspect a Peptide Vial for Physical Damage
Once the vial is removed from its packaging, inspect the container under bright, neutral lighting. Begin with the glass itself. The vial should be intact, free from cracks, chips, fractures, or unusual clouding. Pay close attention to the shoulder, neck, and base, where damage can be easy to miss.
Next, inspect the stopper and crimp seal. The stopper should sit evenly in the vial opening, without obvious tearing, lifting, puncture damage, or deformation. The aluminum crimp should be secure and consistent around the vial neck. A loose, crooked, sharply dented, or partially removed seal can indicate rough handling or potential tampering.
Minor cosmetic imperfections can happen during packaging and transit. A light scuff on an outer label is different from compromised closure integrity. The key question is whether the vial remains sealed, intact, and consistent with a professionally manufactured research product.
Do not use a vial with broken glass, a displaced stopper, liquid leakage, or an obviously compromised seal. Preserve the vial and its packaging, photograph the issue, and contact the supplier through its designated support channel. Do not attempt to repair, recap, or transfer the material into another container. That eliminates traceability and makes a meaningful assessment impossible.
Read the Label Like a Research Record
A high-quality label should do more than display a compound name. It should support identification and traceability. Review the label for the product name, stated amount or concentration where applicable, lot or batch number, and any storage or handling instructions provided by the supplier.
The text should be legible, firmly adhered, and aligned with the product ordered. Look for spelling errors, mismatched product names, missing lot information, or labels that appear applied over another label. These details do not establish the chemical identity of the contents, but inconsistencies should always be resolved before research begins.
Compare the vial label against your order confirmation and any associated product documentation. The compound name, vial count, and lot details should make sense together. For multi-vial purchases, inspect each unit rather than assuming every vial is identical because the first one appears correct.
Batch traceability is especially valuable for researchers who prioritize consistency across repeated work. If an observation needs to be reviewed later, the lot number connects the physical vial to its corresponding documentation and purchase record. That is a basic standard of disciplined research procurement.
Evaluate the Lyophilized Material Carefully
Many peptides are supplied as lyophilized material, commonly described as a dry powder, cake, or puck. Depending on the formulation and fill characteristics, the material may appear as a compact white or off-white cake, a thin layer at the bottom of the vial, or a more delicate powder-like deposit. There is no single visual appearance that confirms quality across every peptide.
What you are looking for is consistency with the product’s expected presentation and the absence of obvious red flags. Significant discoloration, visible foreign particles, unusual wetness, pooled liquid in a vial expected to be dry, or material that appears to have melted and re-solidified should be documented and reviewed with the supplier.
Do not overinterpret minor differences in cake shape. A lyophilized cake can shift, crack, settle, or break during shipping without automatically indicating failure. Vial orientation, vibration, fill volume, and the freeze-drying process can all affect appearance. A cracked cake is not the same thing as a compromised product.
The more meaningful concern is moisture exposure. If a product supplied as a dry lyophilized material appears damp, sticky, collapsed in an unusual way, or accompanied by visible condensation inside an intact vial, pause the workflow. Those signs can be consistent with a closure issue or storage excursion, but they cannot be diagnosed from appearance alone.
Confirm Documentation, Not Just Presentation
Visual inspection is a gatekeeper, not a certificate of analysis. A vial may look flawless while still lacking the identity, purity, or concentration claimed on the label. Conversely, a slightly uneven lyophilized cake may be completely normal. The difference is why serious buyers evaluate both the physical product and the supplier’s quality controls.
Review any available certificate of analysis, batch report, or testing information associated with the product lot. Relevant documentation should identify the material clearly and provide enough detail to connect it to the batch received. Depending on the compound and testing scope, analytical records may address identity, purity, peptide content, or other quality attributes.
Be precise about what a document does and does not show. A purity result is not automatically a sterility result. An identity confirmation does not necessarily verify fill quantity. A generic document without a matching batch reference has less value than lot-specific documentation. Strong sourcing is built on evidence that is traceable, current, and relevant to the item in hand.
This is where premium, lab-tested suppliers separate themselves from anonymous marketplaces. Professional packaging and polished branding are useful, but transparent documentation and responsive support are the stronger indicators of a quality-focused operation.
Verify Storage Conditions and Handle the Vial Conservatively
Check the product’s stated storage guidance as soon as you receive it. Storage requirements vary by compound, formulation, format, and whether the vial remains sealed. Do not rely on assumptions based on another peptide or a previous order.
Until you have confirmed the supplier’s instructions, keep the vial protected from direct light, unnecessary handling, and avoidable temperature swings. Repeated movement between cold and warm environments can create condensation risk and complicate the assessment of a dry product. Store the vial in a controlled location appropriate to the manufacturer’s stated guidance, with the label remaining visible and protected.
For organized research environments, log the receipt date, product name, lot number, quantity, observed condition, and storage location. This takes minutes and creates a stronger record if questions arise later. It also prevents one of the most common avoidable errors: losing track of which vial belongs to which batch.
Know When to Stop and Escalate
Stop the inspection process and contact the supplier if the vial is cracked, leaking, unsealed, mislabeled, materially inconsistent with the order, or shows unexplained moisture or foreign matter. The same applies when documentation cannot be matched to the product lot or when shipping conditions clearly conflict with stated handling requirements.
Avoid trying to “test” a questionable vial through informal methods. Color, smell, powder texture, or online comparison photos cannot verify a peptide’s identity or purity. Only appropriate analytical testing can do that. Research materials should be handled only in accordance with applicable laws, institutional procedures, and the supplier’s research-use designation, not for human or veterinary use.
A clean inspection process reflects the same mindset that drives better sourcing: precision before assumptions. When the vial, label, packaging, lot record, and supporting documentation all align, you have a stronger foundation for controlled, traceable research.